XCloner allows you to send your WordPress backups to remote storage locations including FTP, SFTP, DropBox, Amazon S3, Google Drive, WebDAV, Backblaze, Azure and more.
In this guide, I’ll walk you through sending a backup to Dropbox. This is a reliable and inexpensive way to store your backups away from your WordPress site. If you prefer Amazon, check out this guide to sending WordPress backups to Amazon S3.
Dropbox prices start at under $10 per month for 2 TB of storage space. And, of course, the XCloner plugin is completely free!
Step #1. Create a Dropbox App
- Go to the Dropbox apps area.
- Click the blue “Create App” button.
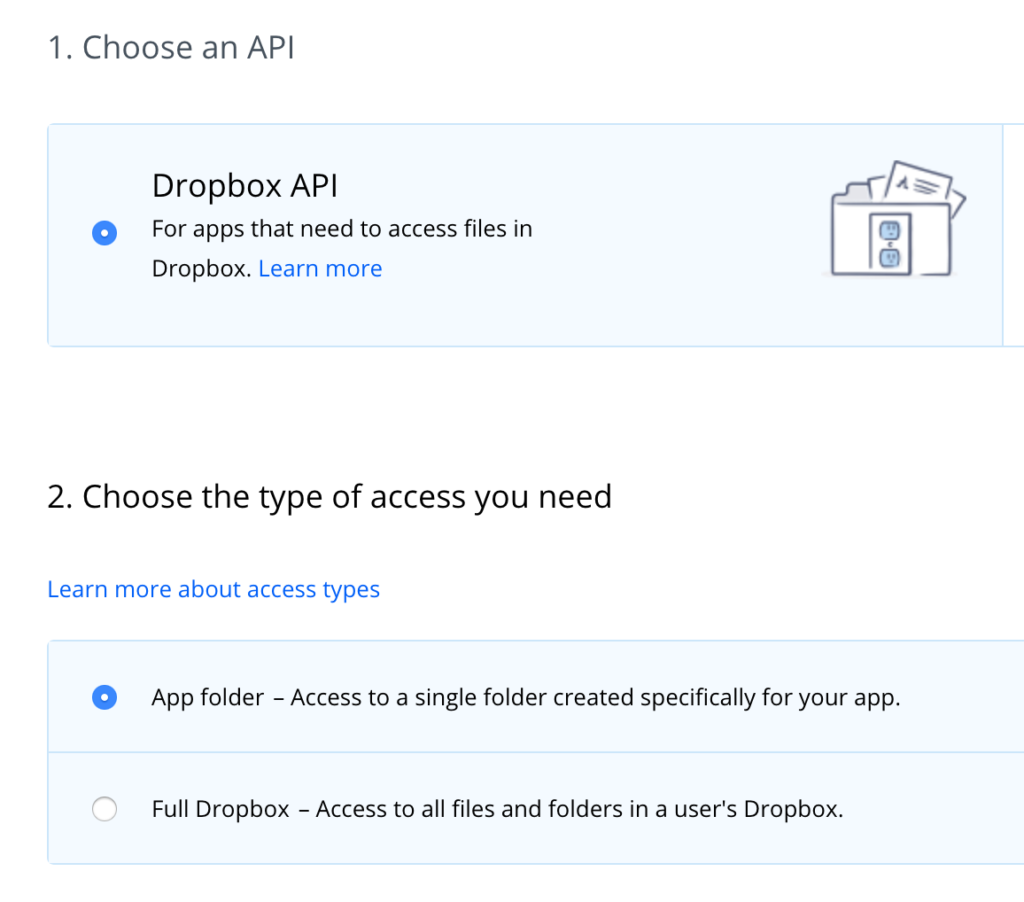
- For option #1, choose the “Dropbox API” option.
- For option #2, you can choose either “App folder” or “Full Dropbox”. For this guide, I chose “App folder” so that all my backups are stored in the same folder.
- Option #3 asks you to name your app. I called my app “WP XCloner Backups”.
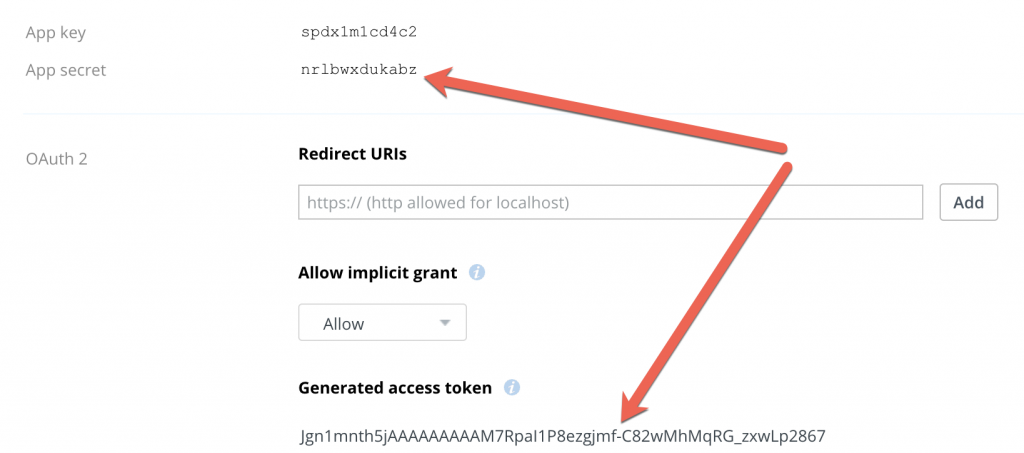
- You need two items from the next screen: “App secret” and “Generated access token”.
Step #2. Set up XCloner for Dropbox backups
Now we’re going to use our two tokens to connect XCloner to Dropbox.
- In your WordPress site, go to “Site Backup”, then “Remote Storage”.
- Click “Dropbox Storage”.
- Enter your “Dropbox Access Token” and “Dropbox App Secret”.
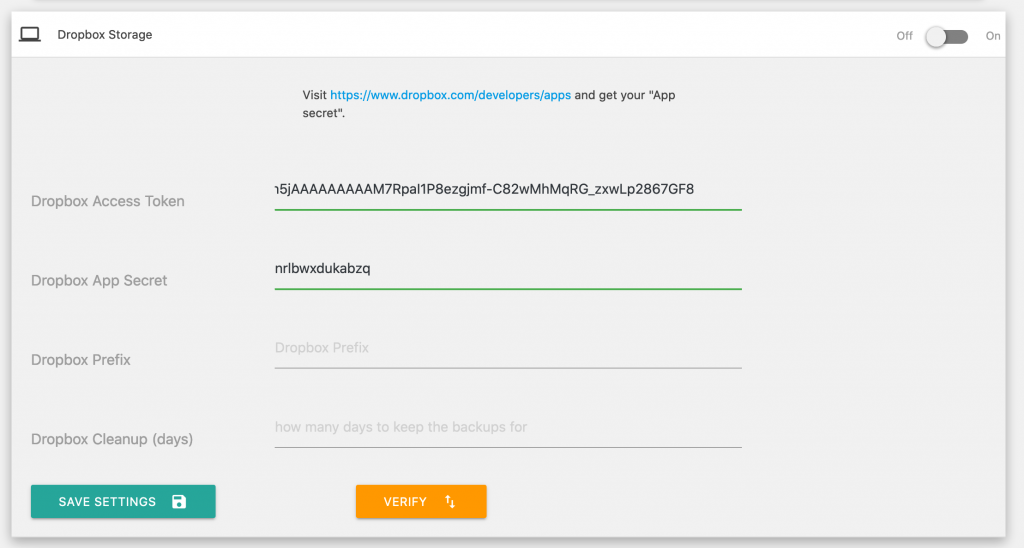
- Click the “Verify” button.
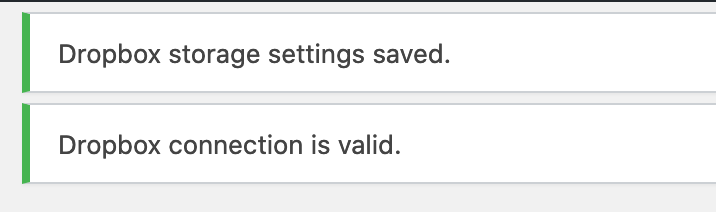
- If your details are correct, XCloner will show you this message:
Step #3. Run a Test Backup
Let’s take a backup of our site and make sure it is sent to Dropbox.
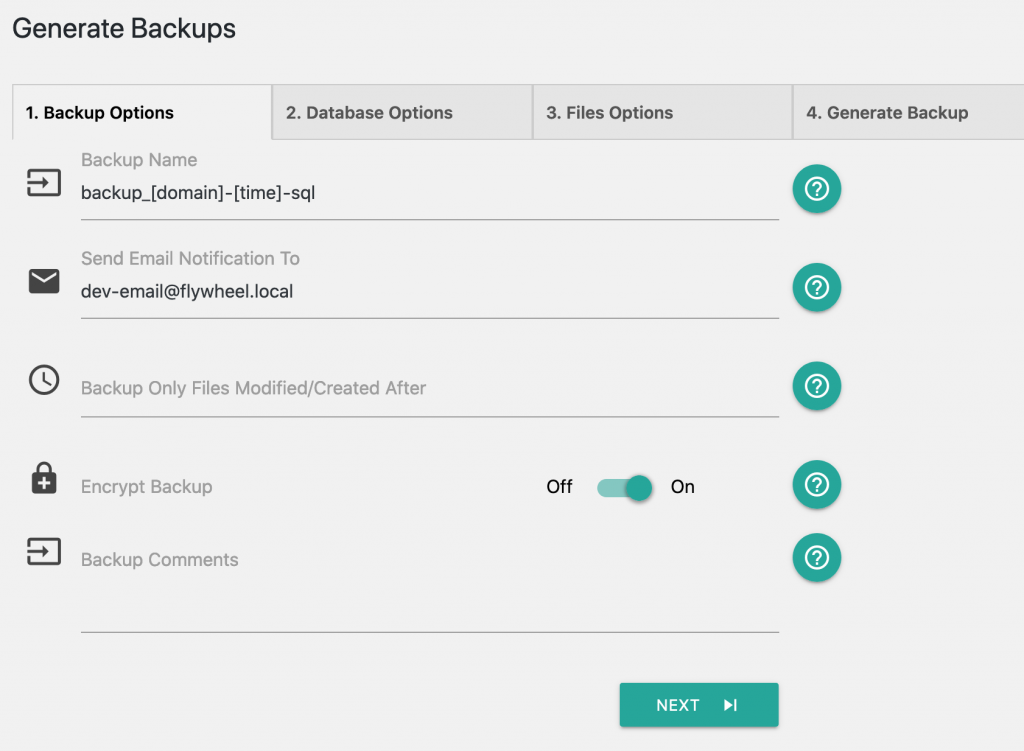
- In your WordPress site, go to “Site Backup” and then “Generate Backups”.
- You’ll see a backup process with 5 steps. These first three steps are beyond the scope of this tutorial: you can leave the defaults on for your test run.
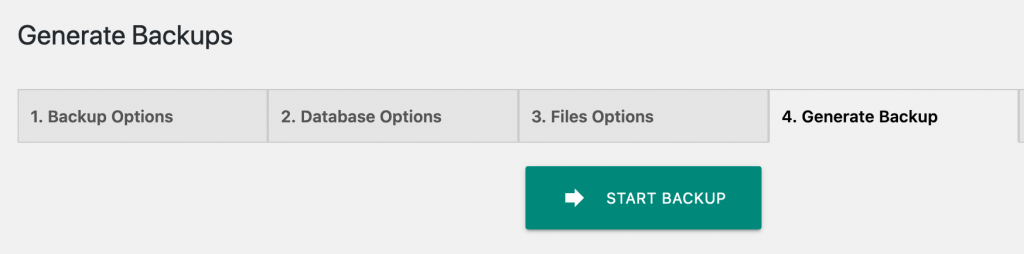
- When you get to “4. Generate Backup”, you can click “Start Backup”. This will create the backup files that you can later send to Dropbox.
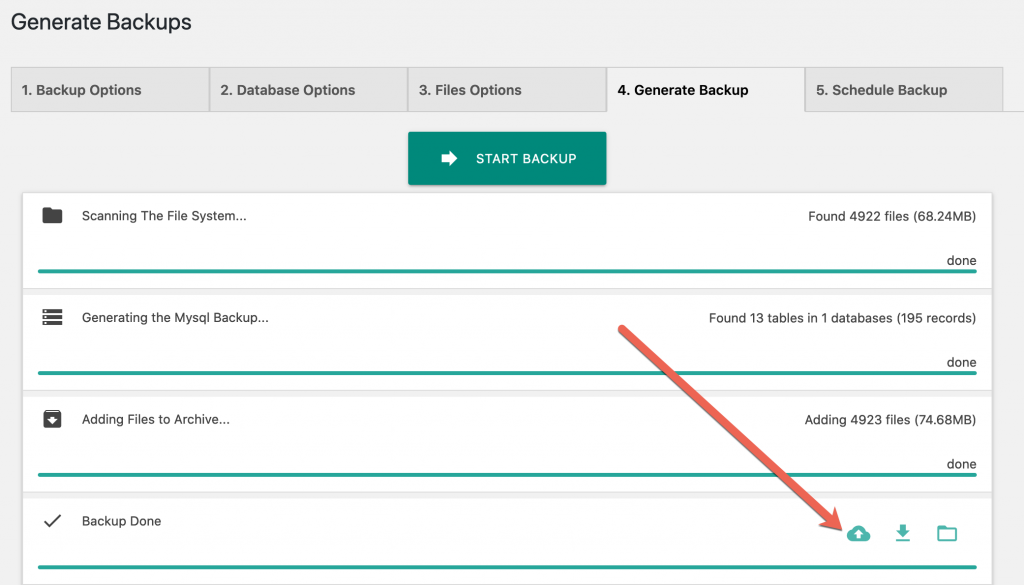
- When the backup has finished, click the small cloud icon you can see in the image below:
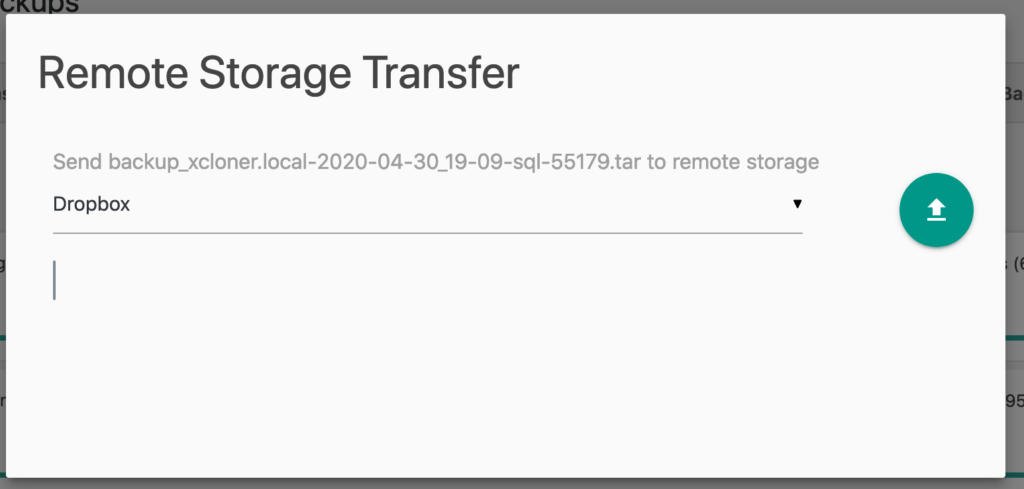
- You’ll see a “Remote Storage Transfer” modal window.
- Choose “Dropbox” from the dropdown.
- Click the big green button on the right side.
- You’ll see this message, “Uploading backup to the selected remote storage… “
- When the process is finished, XCloner will show the message “done”.
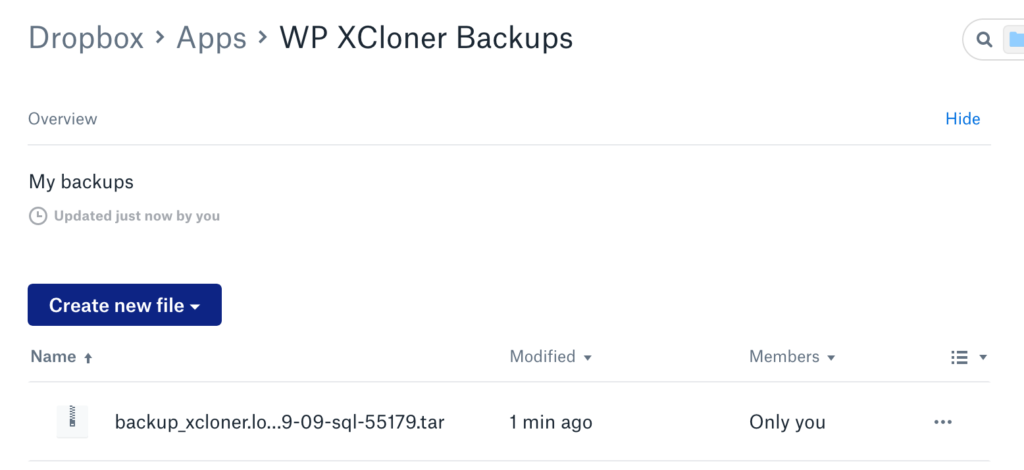
- Head over to your Dropbox site and look for the “Apps” folder.
- Dropbox will have created a folder with the same name as your app. Inside that folder, you will see all the files for your WordPress backup!
Congratulations! You’ve successfully sent your WordPress site backup to Dropbox. If you like how this worked, you can use XCloner to schedule this backup to send to Dropbox on a regular basis.
If you have more than one WordPress site, consider using Watchful.net to manage your sites. This guide shows you how to set up remote backups on Watchful. Watchful can make it a breeze to manage and track the backups of all your sites from one dashboard.