XCloner allows you to send your WordPress backups to Amazon S3.
That is just one of many remote storage locations available in XCloner. You can also send backups to FTP, SFTP, DropBox, Google Drive, WebDAV, Backblaze, Azure and more.
We compared storage prices for website backups and found that Amazon S3 was more expensive than alternatives such Backblaze, Microsoft Azure, and Google Cloud.
However, one of the secret features of Amazon S3 is that is can be really, really, really cheap thanks to a feature called Glacier.
Normally, Amazon S3 costs $0.021 per GB but you can get that down to $0.004 per GB with Glacier. You could even get down to $0.00099 per GB with Glacier Deep Archive. Click here to see Amazon’s pricing options.
Understanding Glacier’s pros and cons
The only catch with Glacier s that it does take longer to pull files of out of Glacier storage. The longer you are willing to wait, the cheaper your storage will be.
This sounds like a problem because when you need to access your backup files, its often an emergency and you need quick access. However, Amazon makes it easy to send files to S3 first, and then onto Glacier. So you can have recent backups sitting in S3 and older backups in Glacier.
You can set this up using “Lifecycle Rules” in Amazon, and I’ll show you how to do that in this guide.
How to send files to Glacier storage
To get started, follow our guide on setting up an Amazon S3 backup for your WordPress site.
Inside your Amazon account, we are going to set up a “Lifecycle Rule” for your storage bucket.
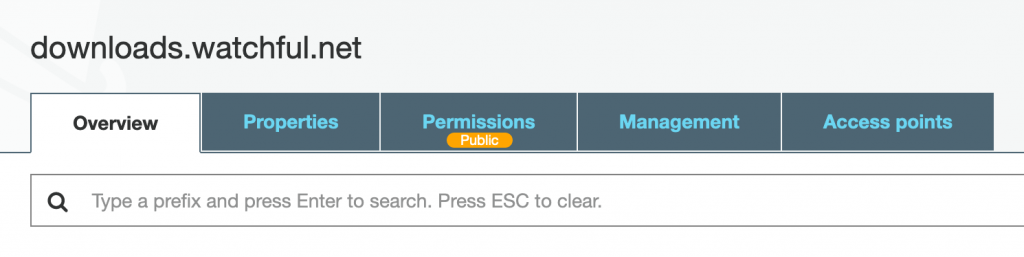
- Navigate to your storage bucket.
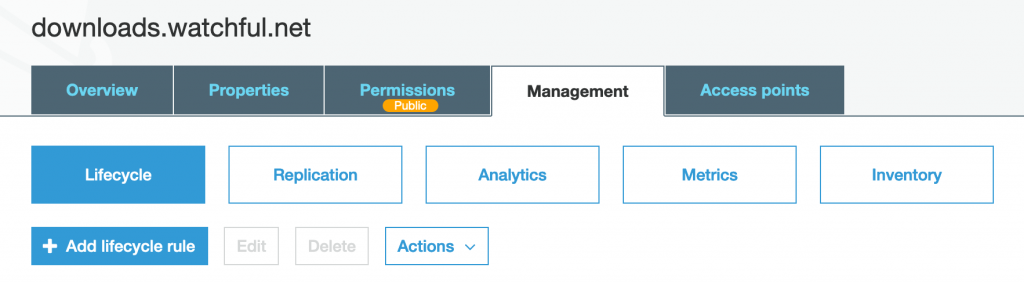
- Click the “Management” tab.
- Click the “Add lifecycle rule” button.
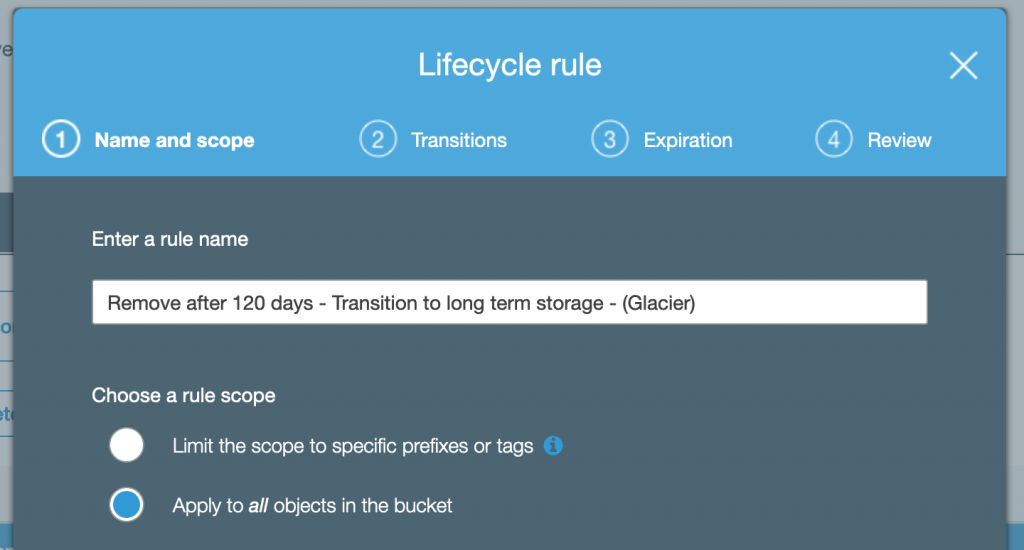
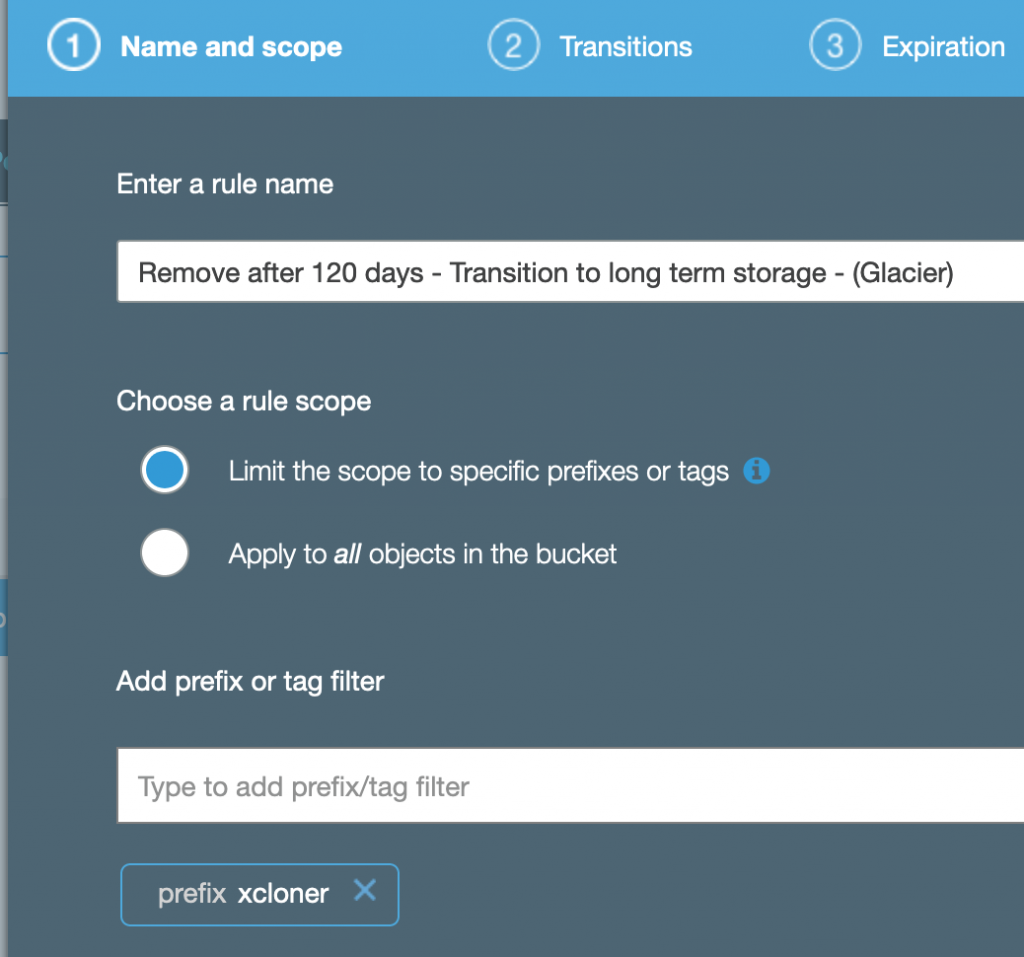
- On tab #1, use the “Enter a rule name” field. In the image below, you can see that I’ve given the rule a very specific and helpful name.
- Click the “Next” button.
- On tab #2, you can decide when your backups will move to Glacier. For example, if you choose “1” for “Days after creation” you will always have a backup from the previous day available in Amazon S3 for instant access. It’s common to choose a range between 1 and 7 days.
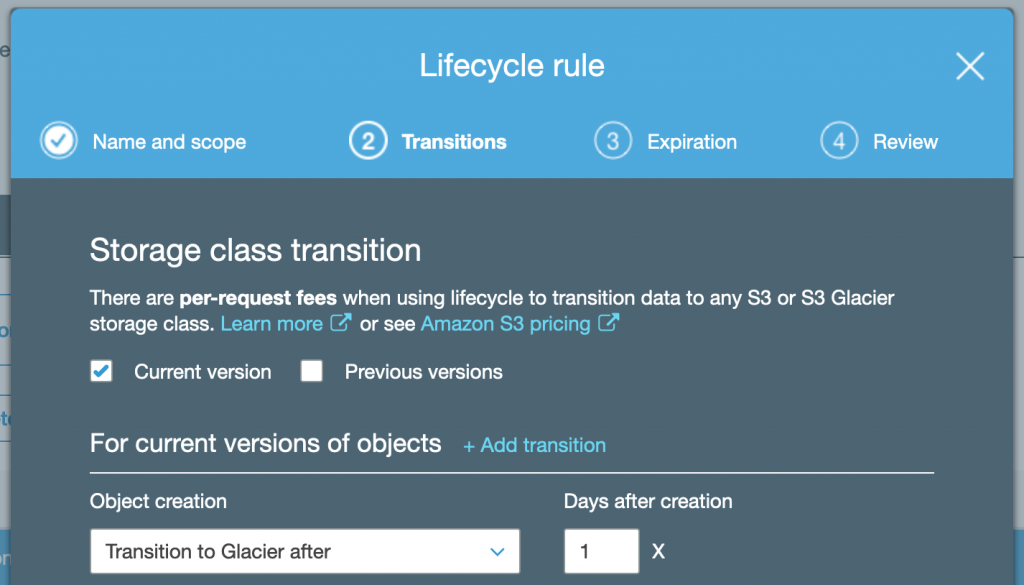
- At this point, Amazon will show you a warning about prices. They suggest ways in which you can select only some files to go to long-term Glacier storage.
Transitioning small objects to Glacier or Glacier Deep Archive will increase costs. Lifecycle transitions include a per-object transition cost. For example, if you were to transition all objects currently in this bucket to Glacier or Glacier Deep Archive, the transition cost would be approximately $0.03 (USD). You can reduce this cost by limiting the number of objects to transition (by prefix, tag, or version) or by aggregating objects before transitioning them.

- If you want to follow Amazon’s warning, click the “Previous” button.
- Choose “Limit the scope to specific prefixes and tags”. For example, in the image below we have a prefix called “xcloner”. This will target any file (such as backup archive) that starts with the word “xcloner”. More details on rule scope are here.
- For this process, you can skip tab #3.
- On tab #4, you can confirm your set up and click “Save”.
At this point, you are ready to test the Glacier storage, although it may take a few days depending on the setting you chose in “Days after creation”.
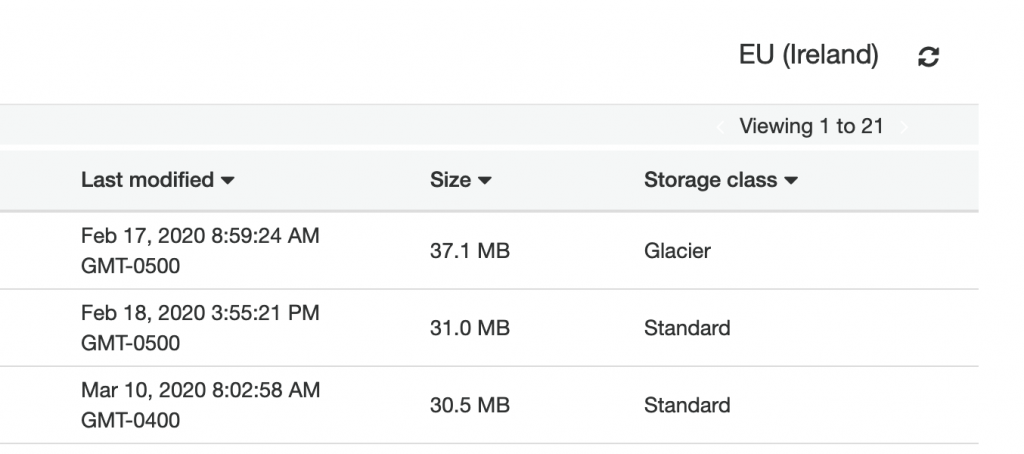
- Inside your bucket, your files in Glacier will listed as normal. They will simply have a different entry in the “Storage class” column.
Do you need better backups?
Congratulations! You’ve successfully sent your WordPress site backup to Amazon Glacier. If you like how this worked, you can use XCloner to regularly and affordably send your backups to Glacier.
If you have more than one WordPress site, consider using Watchful.net to manage your sites. This guide shows you how to set up backups on Watchful. Watchful can make it a breeze to manage and track the backups of all your sites from one dashboard.